Monday, April 30, 2012

Why easy refashions, don't get refashioned


 Why easy refashions, don't get refashioned

This is why clothing that should be easy to upcycle never gets finished.

This is one of my piles of clothing I want to refashion.


I have a huge pile of clothing I want to refashion that is ever growing.  Do you? I bet you do.  I bet you didn't think I would use an actual photo!  Today as I was trying to wrap my head around why I chose to attempt 30 refashions in 30 days.  I was looking at the HUGE pile trying to figure out why the pile just grows instead of producing awesome clothing for me.

Well I know exactly why my pile only grows.  It’s because I want my refashions to be perfections(is that a word)?  And I don’t have time to produce perfection.  Looking around at other peoples amazing blogs dose not help either.  Seriously you crafters are freaking geniuses.  I am not like you all, I only pretend I can refashion.

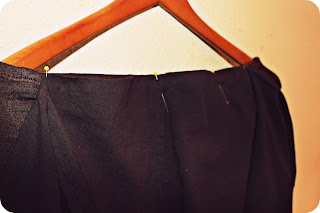
So this is what happens, how I accumulate a pile of clothing.  A great example is the brown dress I got for $2.  It could easily be refashioned.into a skirt,  I could just chop the top off and call it a day.  But I can see so much more potential than that...And this is where the problems start.

Let’s say it is a good day for refashioning so I get out that brown dress.  Now I don’t love brown, so instead of chopping the top and having a lovely refashion. I think how much better it would look if it were black.  After all I do have black dye.

Yes! That is what I will do, I will dye my dress!  As the excitement builds, the chance of this project being completed are ever slowing.  I start to think... “if I am going to get the black dye out I might as well find that other shirt I wanted to dye. This is usually the time things start to go bad and I get overwhelmed looking through the “pile” and give up.  

 But let’s just say its not a give up day, because they have happened. 

So after hours of digging out all my projects that need to be dyed black I am excited and can totally envision how this skirt should have little pink flower added too it.  Only I am out of pink thread!

 Now before you say that I should just go get some thread, living on the Divide means a 3 hr round trip for thread.  So running to get thread is not going to happen.  So I put the brown dress back in the pile along with all the other stuff to dye black.  Making it a day that I have only thought about refashion.  When I could have just chopped the top off and had a cute brown skirt.  But since I wanted a perfect skirt with pink thread on black…. It doesn’t happen.  It ended up, a give up day.

So for my 30 refashion in 30 days challenge.  I am not going to do this to myself.  I am just going to do it.  I am just going to be happy with my 5 min chopped top skirt.  Then if I can updated it to the perfect black with pink thread skirt when I have time I will.

Ok, I showed you my pile, I dare you to show me yours!

Saturday, April 28, 2012

May challenge 30 refashions for 30 days.


I challenge myself, 30  refashions in 30  days

I am challenging myself!

Why?  Here is the story that led me to this challenge, if you care.  If you just want the rules, skip to the bottom.

I am going through a uncomfortable time in my life.  I recently had a baby, my first.  I gained a lot of weight with that pregnancy.  I did not want to buy any clothes in my, after baby size.  It seamed like a waist of money, after all I had planned on being back in my size 2’s right away.  I figured breast feeding was going to help while also making my tops way too small.  So the plan was No new clothes until I could fit into my old ones.

I started feeling very sick not long after the baby was born.  I started losing a lot of hair (I thought this was normal).  Then I started feeling dizzy and sick.  I went to my Dr. thinking I was already pregnant again.  NO, not pregnant.  They told me I was fine. 

At this point I have bald spots (my Dr said that is normal after pregnancy, I don’t believe him) and I weigh more than I did at 40 weeks.  I feel very sick and I am always in pain along with all sorts of other things.  I found a Dr who gave me some blood tests; I should be getting the results soon.  I am worried about them but hope they prove something is wrong with me and that going bald after pregnancy is not normal.

Still, a problem I have is I need clothing that fits.  My maternity clothing, while it fits is out of season.  That is a big problem where I live. (It was snowing and is now in the 100’s)  No matter what this health issue is I am still sticking to the plan of no new clothes until I can fit into my old ones.

So let the refashioning begin!


Rules

My rules for my 30 refashions in 30 days challenge

  1. I can refashion clothing I have
  2. I can buy anything at any thrift store for refashioning  
  3. I can buy new clothing if it is reduced %75 or more for refashioning
  4. I challenge myself for 30 refashions for 30 days
  5. I get to take of 3 days for my birthday.  
  6. *added since it's my first mothers day, I can do something special that day.(not sure yet)


Do you want to join my challenge? 

Sunday, April 22, 2012

Cuties Desktop Sorter

How to make this Cuties Desktop Sorter

This is how it will look when you are finished, this one is made my Kasey@ Life on the DIVIDE
I love cuties!  They are always so good, but some times you get that extra good box.  When you get that extra good box they are amazing.  That extra good box of amazing cuties is what keeps me buying them, over and over My house ends up with tons of empty cuties boxes because I never want to put the box in the recycle bin.  The box just looks so cute! Not to mention its way too sturdy to just toss out.  So I have been finding useful things to do with the empty cuties boxes for years now. Mostly I store half finished craft projects in them.  All the cuties boxes laying around with half finished projects in them is how I came up this great project!  A better solutions to reuse my cuties boxes. A cuties box desk shelf.

This is one of the things you can do with it. I am going to show you how you can make one for your self.


Step 1
Get the supplys
The best part of the project is you get to eat 3 boxes of cuties!

You need
3 empty boxes of Cuties,
scissors
wire cutters
14 Gage solid copper wire (you need 2 strips that are each 46 in long)


step2
Cut the wire
Cut the wire, in to two strips that are each 46in long.

Step 3
Cut the box!
You need to cut away the cuties logo on 1 side of two boxes.  Leaving one box alone.


Step 4
Now you have 2 boxes like this


Step 5
Thread the wire! 
When one side is threaded this is how it will look

In order to thread the wire.  Select the box that will be on the bottom.  Then thread the wire down one side, across the bottom and back up the other side.  When finished it should look like the photo above and below!


See how the long wire sticks out evenly on both sides?  Look below and make sure you make the wire look like that.


Step 7
Next step other side
See both sides should look the same


Step8
Stack the second box.
Make sure the second box you add is the one with the logo cut out.
Too add the the second box just line the wires up with the hols in the box. Then slide the box down


Step 9
The top box will be the one with both logos still on.

The 4 wires will still be sticking out the top.


Step 10
Finish the top

To finish the top off, fold the wire in, pinch the wire very tight, then cut away the excess with your wire cutters.


TA-DA! Your finished with my Cuties Desktop Sorter! You can use it for what ever you like.


Wanna see how I use mine?  Well I have mine full of random things that were just piled up on my sewing desk, homeless.  Well now they all have a home.


That was my grandmas sewing machine.


I tried to get you some great pictures

So what do you think?  I love it just like this.  With the Cuties Logo showing and all the little scuffs and scraps the box has accumulated. However if you like a more finished look that can be done too!  Maybe I will do that next week after I eat three more boxes.

I hope you will make one too!  If you do give it a try I would love to see a picture of how your cuties Desktop shelf turns out.  If you leave it like this or if you embellish it, what ever you choose, I would love to know. So if you send me a picture of how yours turns out then I will publish it on my blog for everyone to see.


<a
 href="http://www.brassyapple.blogspot.com/"><img border="0"
src="http://img.photobucket.com/albums/v714/mycreations/Blog/makeitmondaylogo.jpg"
 /><br /> </a>

Wednesday, April 4, 2012

How to refashion your skirt in to a High-Low hem skirt


Make a Hi-Low Skirt out of a circle skirt

(With pockets!)


A circle skirt before and after, refashioned into a hi-low skirt
Before and After


I have this skits, nothing much is wrong with it but not much is right with it.  The main thing I love about it is that it fits!(I still have lots of baby extra baby weight)
Boring skirt I need to refashion.
  I wanted to make it into one of the new hi-low skirts.  I have never had one. so I was not sure how much I would like it.  I wanted the option to "de-refashion" it back to its original shape; (this term de-refashion was recently coined by over at cotton and curls used by )  When I red her article I thought I was the only one who did that!  

OK! Lets get started!  

Step 1
Acquire a skirt(circle skirt is what I used) to refashion.  Then lay it out flat as pictured below.


Step 2
Pinch a place in the middle, I just eyeballed it, you might want to measure. (you can also do this while wearing it or on a dress form)


Step3
Pull that pinched pice up toward teh waist band.


Step 4
PIN IT!


Step 5
Now you need to pin the rest of the front of the skirt up to the waist band. You will want to pull up a portion that works best for you.(Pin up till about your hips) 


ALL pinned up.... coming along quite well!(better than I expected). My skirt had a liner that showed I just hacked it off. Refashioning means just going with it ya know.


How to refashion a long skirt into a short in the front and long in the back skirt

Step 6
Sew the top! Remove the pins!
You have options here.  If you want the option to be able to remove the stitches later(like I did) then go with a simple stitch.  If you want this to be a premanet refashion  then you can get more fancy wiht top stitching and all that.

TA-DAAAAAAAAAA

Skirt refashioned shorter in the front, with pockets
                    This is actually another photo,  it just looks very similar,hum.  Remind me to talk to my photographer/ boyfriend about mixing things up.
DIY refashion skirt from circle skirt to Hi-low skirt


Look kids, it has pockets! Freaking POCKETS! What more can you ask for? An easy fast refashion with pockets, ahhh I am so happy.  I will be wearing this out tomorrow!


Well friends I hope this tutorial was easy for you to follow. I certainly hope you will try this one, because it is awesome!  I hope you will give it a try, adding your own special touch.  Please send me a photo of you upcycled skirts, it seriously makes my whole day. I typed this at 4:35 AM, so let me apologize for anything that may be confusing. If anything is unclear,  please send me a message and hopefully I can clearafie it for you.