
Tutorial 4

 | |||
| I saw this fort $74!!! at figure 8 maternity I will show you how for $5 |
 |
| It works like so, very nice when you're out and about. |
Step 1
What you need
You will need a top (this double layered style), scissors, Chalk, Fray Check and liquid stitch (or sewing machine) Small scrap of ribbon or fabric.
 |
| This is the top I got out of my sisters closet(not a thrift store but actually garbed it from my sister) |
Step2
Mark with chalk
Try it on and mark with chalk a line down the middle and a line just under the bust (so you know where the ta-tas are!)

Step3

Step3
Cut it up!
Now time to cut this part is the tricky part! You need to be a little crafty with this part and adjust it to your shirt and body, but I know you can do it! You will get the best results if you make a few snips then try it on and check to see how easy the breast is to access, then keep doing this until you have a long enough slit cut to access your breast very easy. Depending on you particular shirt and body size you might need to make this cut longer or shorter than mine. TIP* You might also need to make it a slight oval.

Now time to cut this part is the tricky part! You need to be a little crafty with this part and adjust it to your shirt and body, but I know you can do it! You will get the best results if you make a few snips then try it on and check to see how easy the breast is to access, then keep doing this until you have a long enough slit cut to access your breast very easy. Depending on you particular shirt and body size you might need to make this cut longer or shorter than mine. TIP* You might also need to make it a slight oval.

Step 4
Glue or sew
Now you (probably) need to fasten a ribbon to help keep the slit from showing too much at the wrong time. Use liquid stitch or sew it on. You might need 1,2 or 3 sets of ties.
Glue or sew
Now you (probably) need to fasten a ribbon to help keep the slit from showing too much at the wrong time. Use liquid stitch or sew it on. You might need 1,2 or 3 sets of ties.
 |
| This stuff is the best for any No-sew project! |
 |
| I got this ribbon on a set of towels so it was free |
Step 5
Reinforcement!
Run Fray Check all along the opening adding extra at the top and bottom. (if sewing run a stitch back and forth over the top and bottom and a zig-zag around the opening)
Reinforcement!
Run Fray Check all along the opening adding extra at the top and bottom. (if sewing run a stitch back and forth over the top and bottom and a zig-zag around the opening)

.
TA-DA!

All done, now you have super cute fast and easy nursing top refashioned from a top you might have in the back of your closet. If you make one please show me a picture of how it turned out.
 THANK YOU FOR VISITING
Well I hope you all like the little fixes I made to this post to make it a bit more reader friendly. Please let me know if you have any questions.
TA-DA!

 | |
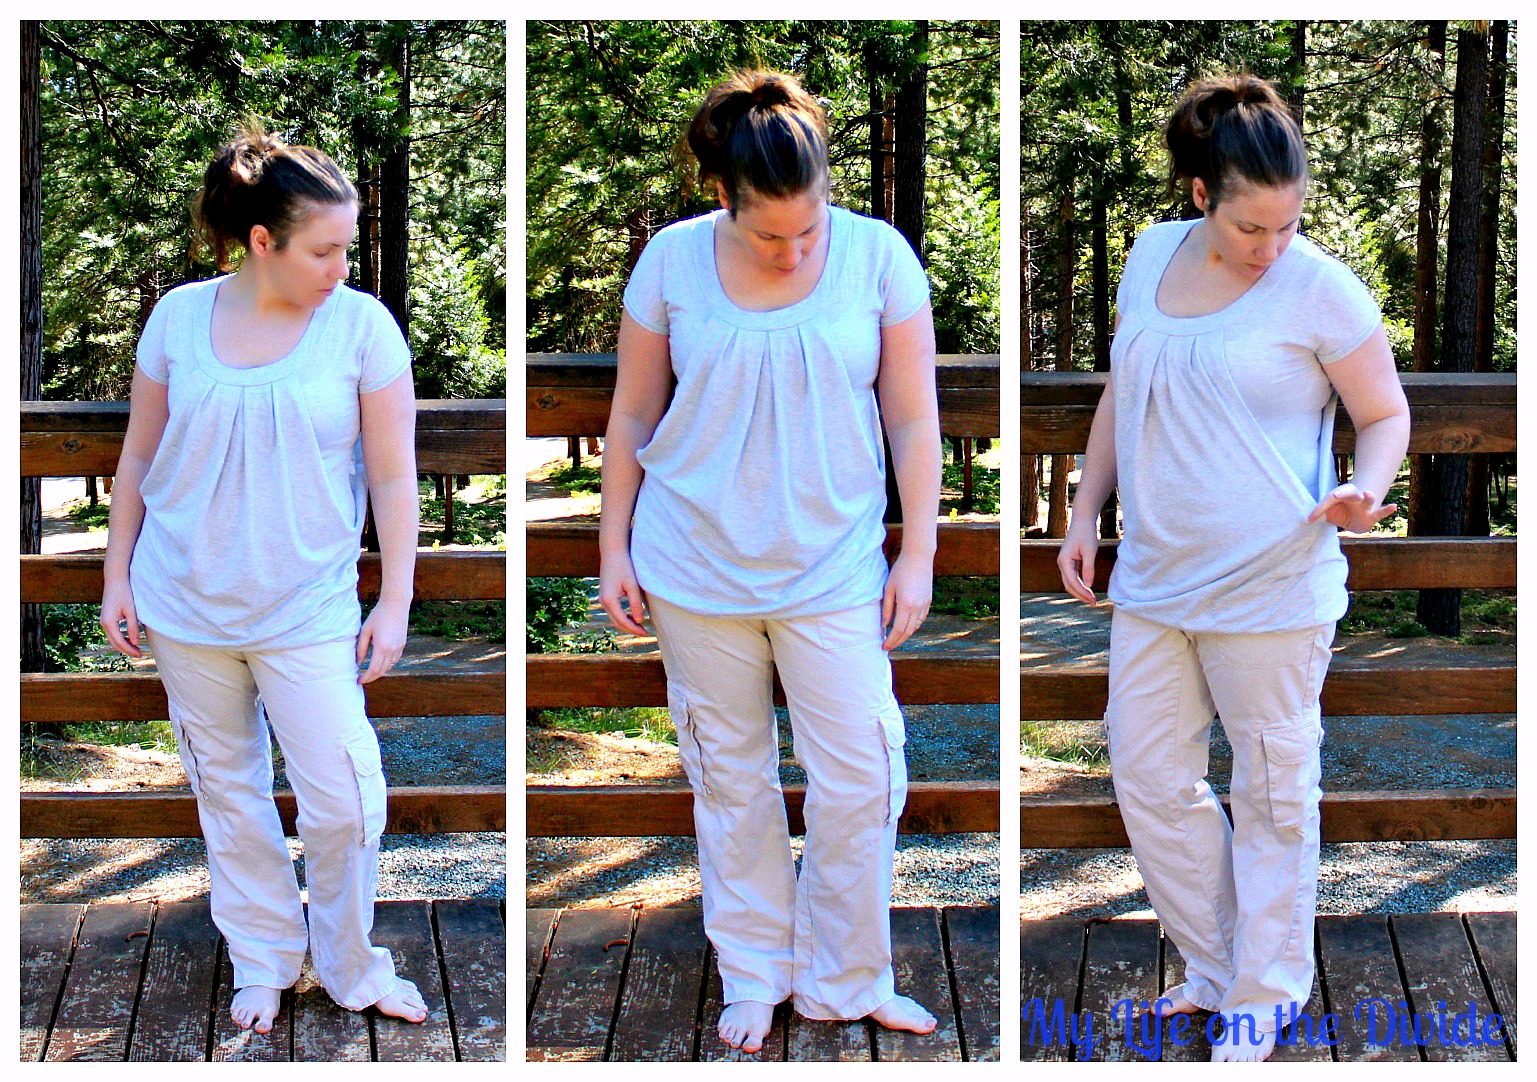
| Look, you can't see anything! |
Well I hope you all like the little fixes I made to this post to make it a bit more reader friendly. Please let me know if you have any questions.
I want to see what it looks like when you're standing up, not nursing. Please add a pic like that.
ReplyDeleteHey Becky! This shirt is so great I actually use it all the time and I am going to make another. I have some photos from when we made it and I will put them up for you tonight!
DeleteThank you so much for looking at the blog, I have another nursing outfit coming up soon that I hope you will check out as well.
Thank you!!!!
DeleteWhat do you think? I hope you will give it a try. If you do please show me a pic. There is also another way to make this style. I should put a tutorial up on the other way.
DeletePS I am now following your blog :) Take care
Hi I want to make this shirt but I am having trouble following the directions, do you dard the top after you cut the opening?
ReplyDeleteHi Mama I did not need to add any darts. The top was very easy, the one I started with was very fitted(the under layer) So I just cut it open. I thought I could leave it like that but in some positions you could see my stomach. So I then added a ribbon that I use to tie the inside layer back together after I use it.
DeleteWhat is the top that you are starting with fit like? You can email me a photo of the top and I might be able to help. This top is Amazing. I am still nursing and I use it often. I hope you are able to make one.
https://bayanlarsitesi.com/
ReplyDeleteCihangir
Heybeliada
Yalova
Adana
004
Adana
ReplyDeleteElazığ
Kayseri
Şırnak
Antep
J5Y
Adana
ReplyDeleteErzurum
Sinop
istanbul
Düzce
HH0QP
Mersin Lojistik
ReplyDeleteAmasya Lojistik
Kayseri Lojistik
Kırklareli Lojistik
Erzurum Lojistik
UİZ47
Çorum Lojistik
ReplyDeleteKaraman Lojistik
Gümüşhane Lojistik
Denizli Lojistik
Artvin Lojistik
58JUH
https://istanbulolala.biz/
ReplyDeleteW61J3
kayseri evden eve nakliyat
ReplyDeleteaydın evden eve nakliyat
kütahya evden eve nakliyat
gümüşhane evden eve nakliyat
balıkesir evden eve nakliyat
EE27
tekirdağ evden eve nakliyat
ReplyDeletekocaeli evden eve nakliyat
yozgat evden eve nakliyat
osmaniye evden eve nakliyat
amasya evden eve nakliyat
RNY
urfa evden eve nakliyat
ReplyDeletemalatya evden eve nakliyat
burdur evden eve nakliyat
kırıkkale evden eve nakliyat
kars evden eve nakliyat
028M
düzce evden eve nakliyat
ReplyDeletedenizli evden eve nakliyat
kırşehir evden eve nakliyat
çorum evden eve nakliyat
afyon evden eve nakliyat
P2RUZ
7E367
ReplyDeleteBalıkesir Parça Eşya Taşıma
Samsun Şehir İçi Nakliyat
Kilis Evden Eve Nakliyat
Edirne Şehirler Arası Nakliyat
Maraş Şehirler Arası Nakliyat
Sakarya Lojistik
Iğdır Lojistik
Yenimahalle Boya Ustası
Coin Nedir
A169A
ReplyDeleteKarabük Evden Eve Nakliyat
Bartın Lojistik
Rize Lojistik
Bolu Şehirler Arası Nakliyat
Aydın Parça Eşya Taşıma
Ankara Fayans Ustası
Edirne Lojistik
Zonguldak Lojistik
Amasya Evden Eve Nakliyat
59E3E
ReplyDeleteAydın Evden Eve Nakliyat
Sweat Coin Hangi Borsada
İzmir Evden Eve Nakliyat
Huobi Güvenilir mi
Çankırı Şehirler Arası Nakliyat
Edirne Şehir İçi Nakliyat
Floki Coin Hangi Borsada
Mefa Coin Hangi Borsada
Kilis Lojistik
19ED9
ReplyDeleteÜnye Boya Ustası
Nevşehir Parça Eşya Taşıma
Bolu Lojistik
Muş Evden Eve Nakliyat
Batman Şehirler Arası Nakliyat
Ort Coin Hangi Borsada
Urfa Evden Eve Nakliyat
Burdur Lojistik
Ankara Şehir İçi Nakliyat
FE881
ReplyDeleteCoin Kazma
Coin Madenciliği Siteleri
Coin Nasıl Kazılır
Binance Nasıl Oynanır
Bulut Madenciliği Nedir
Mexc Borsası Güvenilir mi
Bitcoin Kazma
Yeni Çıkan Coin Nasıl Alınır
Bitcoin Hesap Açma
44E87
ReplyDeleteBtcturk Borsası Güvenilir mi
Kripto Para Üretme Siteleri
Coin Kazanma
Mexc Borsası Kimin
Bitcoin Mining Nasıl Yapılır
Binance Komisyon Ne Kadar
Binance Hesap Açma
Bulut Madenciliği Nedir
Kripto Para Üretme
235A9
ReplyDeleteamiclear
0F3EB
ReplyDeletesiirt mobil sesli sohbet
aydın rastgele sohbet odaları
diyarbakır canlı sohbet ücretsiz
ücretsiz sohbet odaları
elazığ canli sohbet bedava
konya seslı sohbet sıtelerı
kastamonu sohbet chat
burdur sesli sohbet mobil
tunceli yabancı sohbet
5769F
ReplyDeletebedava sohbet odaları
Antep Random Görüntülü Sohbet
bursa yabancı canlı sohbet
parasız sohbet siteleri
karaman görüntülü canlı sohbet
Denizli Rastgele Görüntülü Sohbet
sesli sohbet sesli chat
Adıyaman Sohbet
kırıkkale sohbet uygulamaları
ACDC5
ReplyDeleteInstagram Beğeni Satın Al
Yeni Çıkan Coin Nasıl Alınır
Floki Coin Hangi Borsada
Linkedin Takipçi Satın Al
Btcturk Borsası Güvenilir mi
Twitter Takipçi Satın Al
Kripto Para Üretme
Pepecoin Coin Hangi Borsada
Sohbet
24CD9
ReplyDeleteTwitter Takipçi Hilesi
Instagram Beğeni Satın Al
Likee App Takipçi Hilesi
Coin Kazanma
Tumblr Beğeni Hilesi
Arg Coin Hangi Borsada
Kripto Para Kazanma
Ceek Coin Hangi Borsada
Azero Coin Hangi Borsada
09FF5
ReplyDeletekripto para telegram grupları
https://toptansatinal.com/
poloniex
binance
huobi
gate io
binance
huobi
paribu
1E6A9210CA
ReplyDeleteinstagram takipçi alma siteleri
441D5388E4
ReplyDeleteen ucuz instagram takipci
678C8A916F
ReplyDeletetürk instagram takipçi
2D8D4D92F5
ReplyDeleteig takipçi
A46F419B75
ReplyDeletetwitter da takipçi arttırma
E706641B79
ReplyDeletetwitter ucuz takipçi
638B4889FD
ReplyDeleteig takipçi satın al
Osm Promosyon Kodu
Dude Theft Wars Para Kodu
Kazandırio Kodları
War Robots Hediye Kodu
Lords Mobile Promosyon Kodu
Erasmus Proje
101 Okey Yalla Hediye Kodu
Türkiye Posta Kodu
44503B46BC
ReplyDeleteinstagram düşmeyen takipçi
instagram beğeni satın al
güvenilir takipçi
instagram takipçi
mobil ödeme takipçi
DA7D7402A5
ReplyDeleteen ucuz takipçi
tiktok beğeni satın al
tiktok takipçi
gerçek takipçi
takipçi
966A8670BE
ReplyDeletemmorpg oyunlar
ucuz sms onay
mobil ödeme bozdurma
takipçi satın alma
-