Monday, July 29, 2013

Easy Earring Tutorial, Learning the Wrapped Loop

This is an easy step by step tutorial that will teach you how to make this very easy pair of earrings. I just love this pair of earrings, I have made them in about 4 colors. In this tutorial you will learn how to make the wrapped loop. If you want to learn how to make wire wrapped jewelry then the wrapped loop is one of the first wire wrapping techniques you need to learn. 

Ok so we are starting with a very simple pair of earrings with a wrapped loop tutorial.
For this tutorial I used natural shell beads but a lot of other beads will work

The most important thing you will learn in this tutorial is how to make the wrapped loop. It is an important foundation in wire wrapping. In the future I will be teaching you other, more complicated techniques so you can build on what you learn. Then you will be able to make more complicated items. But for today we are starting very simple. 

how to make a simple pair of earrings with natural shell beads


What I used:
2 Beads
2 Sterling Silver Earring  hooks
2 Sterling Silver Headpins
Set of Basic Jewelry Pliers
then string String your bead onto a 


Step Two:Create the wrapped loop. It was hard for me to get good photos of how to do this so I am sharing this link art beads( they have some very good tutorials.)


Step three
Attach the Ear wire. Gently twist the
 ear wire open and slip the wrapped
 loop on.(I opened the ear wire more
 than you should for photo purposes)
 The less you open the ear wire the
 stronger it will remaine.


That is it! when you are done you should have these amazing  summer earrings. I just love them.
Thanks for looking! Let me know what you think this quick and easy earring tutorial.


Saturday, July 27, 2013

Best of Splatter Painted DIY's

DIY Splatter Painted TUTORIALS ROUNDUP

I am in love with the splatter painted trend. Well I think it is a trend. I mean if you look at the J. Mendel Pre-Fall 2013 fashion show, you will see a lot of amazing splatter painted pieces. Well J. Mendel calls it exploded Floral but it sure looks like splatter paint to me. I really loved the two below, what do you think, splatter paint or exploded floral? Anyone who splatter paints an evening gown is a genius in my book
2 garments from the j. mendel Exploded-floral-print collection
. I tell you my head is filling up with refashion plans for all my old bridesmaid dresses.(Always a bridesmaid never a bride,but that is a story for another time.)

I still don't know splatter paint is a trend that will really take off. Just because somthing is on the runway does not always mean it will be a huge trend. Just look at this Astrid Anderson Spring 2014 look. Hummmm 
Regardless if splatter painting is going to make a huge comeback or not. The refashion I did published a few days ago was inspired by it.  
So I rounded up 8 other wonderful tutorials here for you to enjoy. They use different painting techniques that I know you are going to love. One of the tutorials shows how to splatter paint by blowing paint through a straw,while another teaches you how to  paint by filling balloons with paint then throwing darts at them.... I can't think of a more exciting paint technique. I will be trying that one for sure

8 plus 1 splatter paint tutorials


* tutorials from amazing blogs and 1 form mine. You can get the full tutorial by clicking on the links below


Wednesday, July 24, 2013

DIY Splatter Painted Denim Shorts for Big Girls or Little Girls

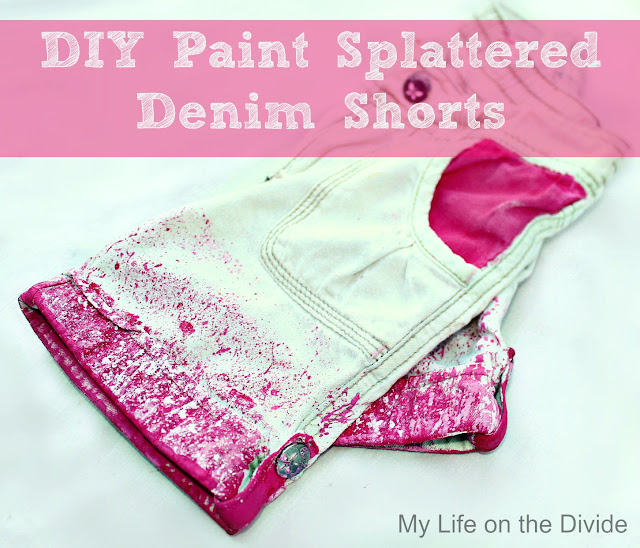
I fell in love with a pair of white and hot pink dip dyed shorts a few days ago. The dip dyed  hem looked more like 80 style splatter paint, then fabric dye. I knew that I could DIY a pair of  cute splatter painted hem shorts in no time. I hope you enjoy my tutorial for a pair of white denim shorts with neon splatter paint hem. 
DIY girls splatter painted shorts
This is a step by step tutorial that will teach you how to refashion jean shorts into white and pink splatter painted shorts. I used girls size shorts but this tutorial will work for any size shorts. I used pink for my splatter painted hem but I think any color will look perfect. 

Before and After


 I think you could get away with out using the textile medium, but I love it. It is very affordable on Amazon.com. It makes your acrylic paint into fabric paint.(so that one purchase makes your whole paint stash turns into fabric paint!) All you have to do is mix some of the textile medium into your paint and your good to go. Using the textile medium will make the paint softer and more durable when you wash it. 
When you are finished your shorts should look somthing like this! If you do make a pair please let me  show them off! Send me a picture I will publish it for you. 

A while back someone donated a big bag of very used girls clothes to me. I always love a donation! For this project I pulled some jean shorts from that bag. They had good fabric and bad stains. I knew they would be the perfect pair to fix up and donate to someone's little girl.
(Please email me if you need a project donated to your little one)

Lets get started with this tutorial!

Steps 1-4(above)
1. Get Denim shorts
2. Add bleach and water to a sink 
3. Soak and watch until they reach the color you want
4. Wash and Dry 
 *Tip After you remove your shorts out of the bleach and water mix they will continue to become lighter and lighter until they are rinsed clean of all the bleach. Just like cupcakes keep on cooking until cool
Step 5
After your shorts are dry put cardboard between the legs, This will prevent any paint from seeping through. Also use tape and plastic to protect any part of the shorts that you do not want getting splatter painted.
Step 6
Mix your paint. 
  • Jar 1, mix the textile medium with the pink. (fallow the directions on the bottle)
  • Jar 2, mix the textile medium with the White
  • Jar 3, mix some of the pink and white(after the medium is added) together to make a lighter pink color.
*Tip I made a little diagram about mixing the paint for those of you who are more visual learners.


Step 7

Paint your shorts
  • 1st paint the dark pink along the hem on the front and back of the shorts. Leave it imperfect.
  • 2nd Splatter paint with the light pink over the first(dark) layer of paint.
  • 3ed Splatter with the white paint over the first 2 layers of paint. 
*Tip To get the splatter look use your paint brush to flick and drizzle paint.
After the splatters dry you remove the plastic. You can then add some other details if you want. I painted the coin pocket and the button detail in solid pink. Let it dry according to the textile medium directions. Then wash and dry.
Add some paint details

I love how this refashion worked out!  I hope you got some inspiration out of this post. If you did head over to https://www.facebook.com/LifeontheDivide and let me know what youthink

Thank you 


-