
DIY Galaxy Tutorials Roundup
I saw some galaxy jeans a while ago and fell in love with them. I thought; I am soooo going to make those! Then when I looked online I realized that I was wayyy behind on this galaxy trend, nothing new. My fellow bloggers have been posting some fabulous DIY galaxy tutorials for over a year now. I decided to show you some of my favorite galaxy trend tutorials. So I tracked down some of the best DIY Galaxy Tutorials on the web and made a cute little DIY galaxy graphic(easier than a whole tutorial).And there you have it.So I hope you enjoy looking at these fabulous tutorial as much as I did. They all used a different techniques to achieve the galaxy look So if you decide to make your own Galaxy jeans, shorts or even home item. Well you have plenty of tutorials here to get ideas from.

Note: If you decide to DIY some galaxy item I would love a picture of it to post on this will blog of mine. If you have a DIY galaxy tutorial on you blog that I missed and you would like included in my list, please send me a link.
1) DIY Skinny Jeans by Eliva Hellena @ http://elivahellena.blogspot.com
I love how she did these skinny jeans, they have a lot of steps but that makes them look really unique. I think they are the only DIY Galaxy jeans I found that look like they have moons on them, that is so cool!

2) Galaxy Nails - Nail Art Tutorial by pretty squared @ http://prettysquared.blogspot.ca/
I think these nails look amazing, as well as the photos. I think this is the best Galaxy Nail Art on the web! Some of her nails are pink and some are darker, a lot of work went into these.

The way she did her jeans makes them look professorial, I really love this pair. Thy are very "galaxy" but not over the top. Perfect for a low key day.

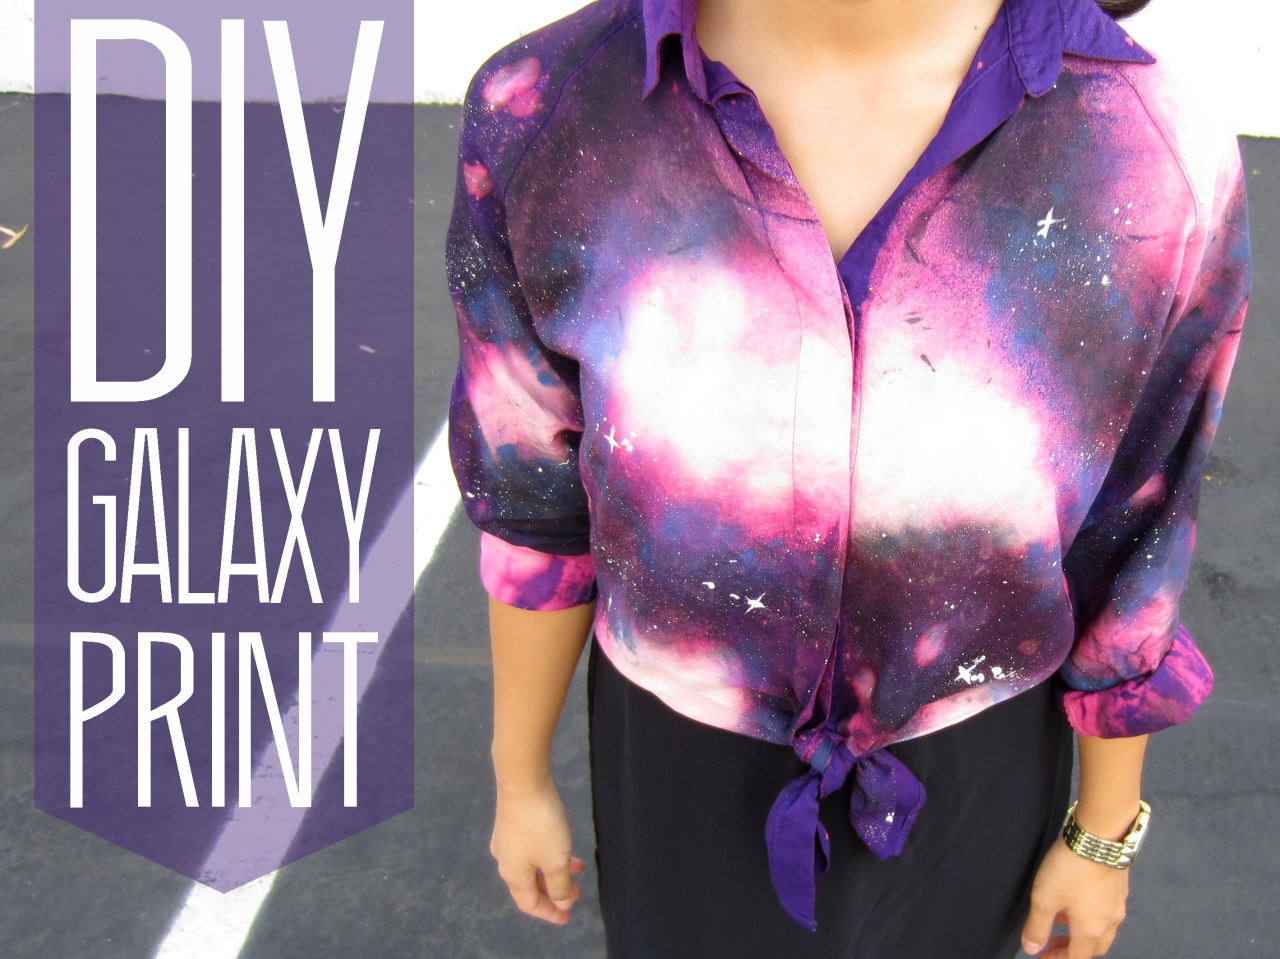
4) DIY Galaxy Print Blouse from lets get thrifty
I like how this would work on any style top. You could use her DIY galaxy technique on a top like the one she used, or on another shape top that you might already have.
 '
'5) DIY Galaxy Designer leggings Tutorial @talking trash & wasting time
This tutorial is unlike all the others. I like the result and that this is leggings because they are so versatile.

6) DIY Galay Print @ beauty lab
This tutorial is not in English, but that is not a problem at all, just push the translate button and your good to go. You can fallow her DIY Galay tutorial and have a new shirt in no time.
7) How to make galaxy candle holders @ sheepy.me
This is the only tutorial I am shearing that is not a clothing item, its candle holders! I think you could use this technique on other household items as well. This is very unique and I love it.
.jpg)
8) DIY Galaxy Skirt @ sammi-jackson.com
WOO HOO this skirt is sexy sexy! I love it! She did such a good job on it. I know that if I try her technique that I will need to do it on somthing a little bit longer. She ROCKS this skirt though. I know you will just love how quick and easy her DIY galaxy skirt tutorial is.

9)How to make a galaxy scarf @ scarves.net - In the loop
I love this idea! I think this is a perfect way to add some galaxy DIY into your life with out going to the extreme This would be nice for work or party.

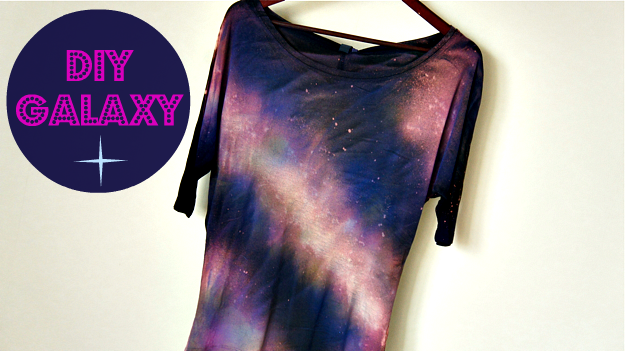
10) DIY Galaxy Shirt @ Stars for Streetlights
Over at this blog Stars for Streetlights she has a bunch of DIY Galaxy Tutorials! I picked the one I liked the most, but they are all prefect! You should go checkout her blog and see what Tutorial you like the most.

11) DIY Galaxy Prints @ gave that
Of all the DIY Galaxy print tutorials that I posted here this is the only one that has a video. So If you are the type that prefer to watch your tutorial, then this is the one for you.
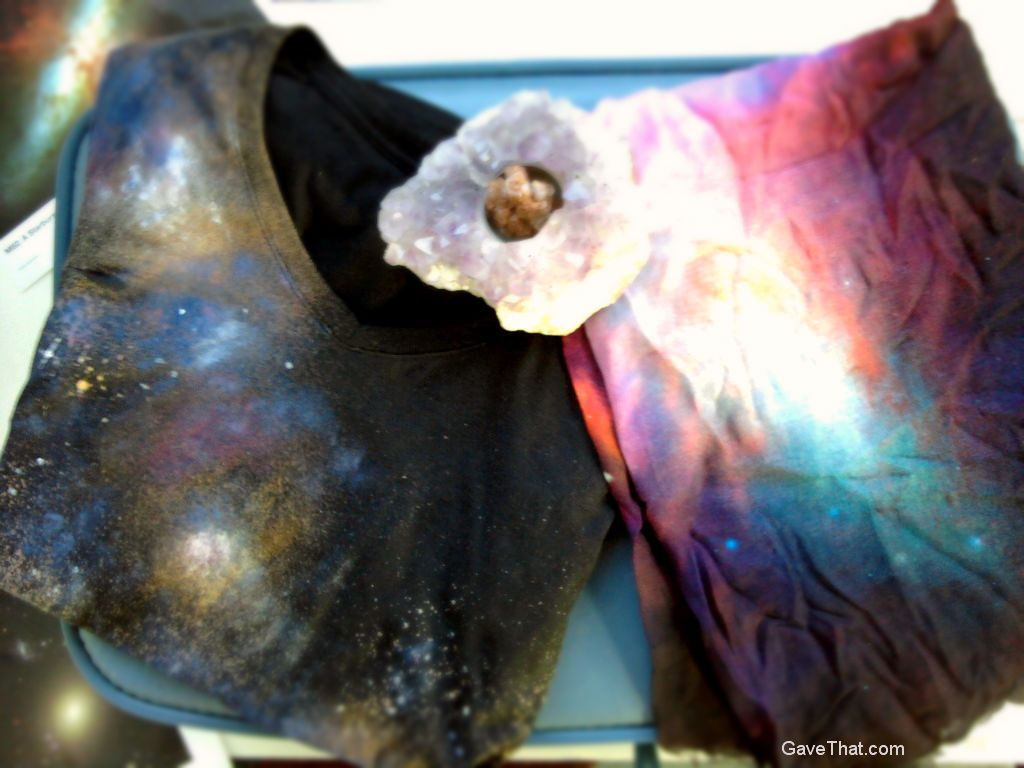
http://www.gavethat.com/2012/08/diy-galaxy-prints.html


